

The skillet’s sizzling, and I can’t wait. Just formed the patties for Salmon Cakes With Canned Salmon, and honestly, I’m already thinking about seconds.
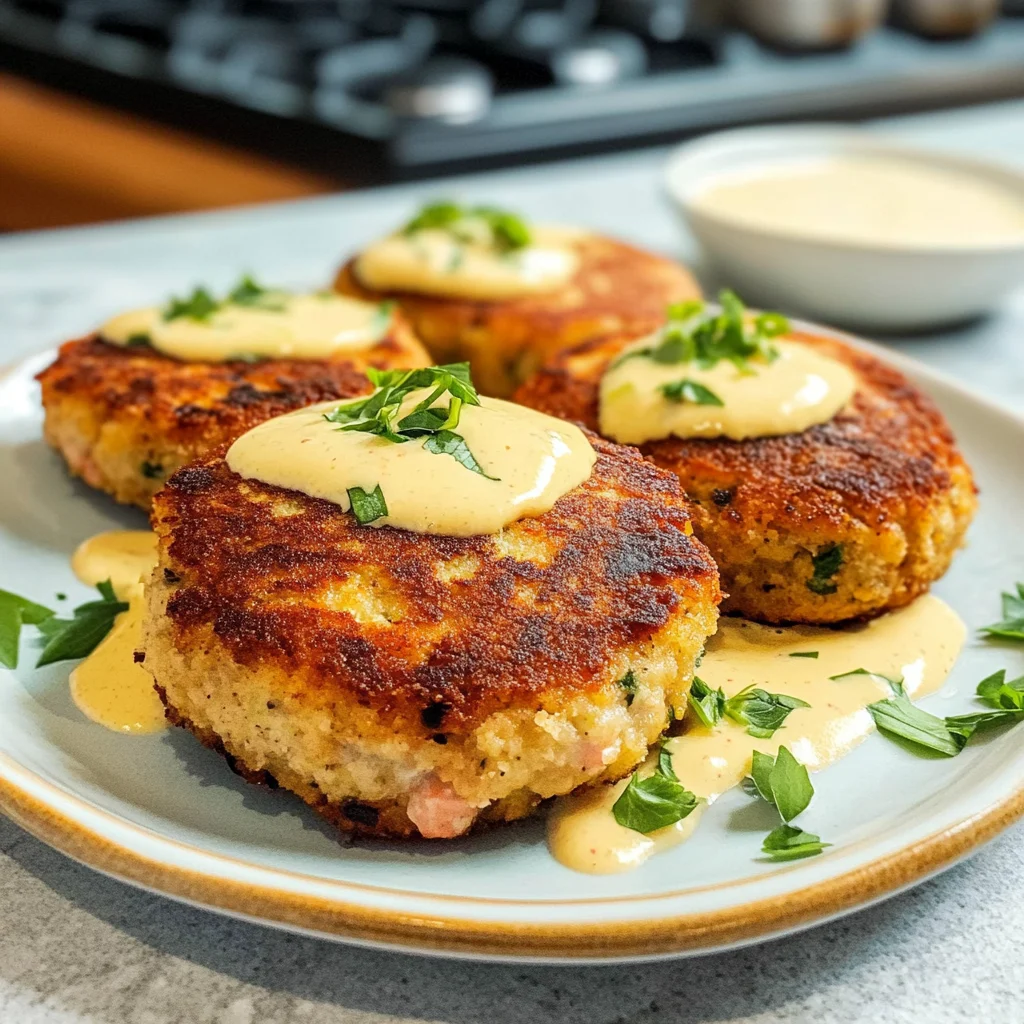
This recipe’s perfect for nights when you’ve got a fridge full of nothing but a couple cans of salmon and maybe some bread crumbs. No need to fuss over fresh fish or fancy sauces — you can whip these up in under 30 minutes with pantry staples. (I know, I know — canned salmon gets a bad rap.) Crunchy on the outside, tender on the inside. Dinner’s sorted!
Why You’ll Love This Salmon Cakes With Canned Salmon
- Super Easy Prep: Just mix, form, and fry. Seriously, it takes like 15 minutes to whip these up.
- Crisp-Tender Texture: The outside gets all golden and crunchy while the inside stays moist and flaky. So good!
- Flavor Packed: With lemon juice and Dijon mustard, every bite bursts with zingy goodness that makes you want more.
- Versatile Meal Option: Great for lunch or dinner, and they pair well with everything from salads to pasta — or just eat ’em plain.
- Refrigerate First: Chilling patties before cooking helps them hold together better. (Trust me, skip this step at your own risk!)
Salmon Cakes With Canned Salmon Ingredients
For the Base:
canned salmon (2 cans) — Go for Wild Planet canned salmon, or your cakes’ll taste bland and mushy.
bread crumbs (1 cup) — Use panko bread crumbs instead of regular, or they won’t be crispy enough.
egg (1 large) — Don’t skimp on the egg; it binds everything, or you’ll end up with crumbles.
green onions (1/4 cup) — Slice those green onions thin, or their flavor won’t shine through the cakes.
lemon juice (1 tablespoon) — Fresh lemon juice is a must, or your cakes’ll be flat and lifeless.
Dijon mustard (1 teaspoon) — Don’t even think about swapping Dijon; its tang is key to flavor!
garlic powder (1/2 teaspoon) — Use fresh garlic if you can; garlic powder’s weak and won’t pack the punch.
salt (1/2 teaspoon) — Don’t be shy with salt; under-seasoned cakes are a total flop.
black pepper (1/4 teaspoon) — Freshly cracked black pepper brings a kick; pre-ground’s just not the same.
For Cooking:
olive oil (2 tablespoons) — Use extra virgin olive oil for flavor, or your cakes’ll taste greasy.
For Serving:
tartar sauce (1 cup) — Only use quality tartar sauce; it elevates the dish, or it’ll fall flat.
Full measurements in the recipe card below.
How to Make Salmon Cakes With Canned Salmon
1. Mix the Base: In a large bowl, combine the drained canned salmon, bread crumbs, egg, green onions, lemon juice, Dijon mustard, garlic powder, salt, and black pepper. Mix until everything’s thick and well combined.
2. Form Patties: With your hands, form the mixture into patties about 2-3 inches in diameter. They should feel sturdy but not too tight (trust me on this).
3. Chill the Patties: Place the formed patties on a plate and refrigerate for about 10 minutes to help them firm up. This step’s key — don’t skip it!
4. Heat the Oil: Now, heat the olive oil in a large skillet over medium heat until it shimmers (you’ll see tiny ripples).
5. Cook the Cakes: Add the salmon cakes to the skillet in batches if necessary. Cook for about 4-5 minutes on each side or until they’re golden brown and crispy — you’ll hear that satisfying sizzle.
6. Drain Excess Oil: Remove the cakes from the skillet and place them on a paper towel to drain any excess oil. Don’t rush this part; letting them sit for a minute keeps them from getting soggy.
7. Serve Up!: Serve hot with tartar sauce on the side if desired (I love dipping mine!). These Salmon Cakes With Canned Salmon are so worth it!
Exact quantities in the recipe card below.
How to Store Salmon Cakes With Canned Salmon
- Room Temperature: Don’t leave them out for more than 2 hours. They won’t hold up well sitting out, so it’s best to refrigerate if you’re not serving right away.
- Refrigerator: Store in an airtight container for up to 3 days. Just know that the texture might get a little softer (not ideal, but still tasty).
- Freezer: Wrap each cake in plastic wrap and then pop them into a freezer-safe bag for up to 3 months. They’ll be a bit different when thawed, but they still pack flavor!
- Reheating: Heat in a skillet over medium heat until they’re warmed through and crispy again, about 3-4 minutes per side. You’ll know they’re ready when you hear that satisfying sizzle!
What to Serve with Salmon Cakes With Canned Salmon?
It’s a bit rich on its own, so adding some sides keeps the meal balanced and interesting. Here are some tasty ideas:
- Tartar Sauce: The tartness cuts through the richness, adding a zesty kick that brightens every bite.
- Coleslaw: A crunchy, fresh side that brings texture contrast and a bit of sweetness to balance the savory cakes.
- Cucumber Salad: Cool and crisp, it offers refreshing acidity that keeps things light. Just slice cucumbers and toss with vinegar.
- Roasted Vegetables: Try tossing seasonal veggies in olive oil, salt, and pepper, then roast for about 20 minutes until tender. It adds color and depth.
- Quinoa Salad: The nutty flavor pairs well while providing a chewy texture. Mix cooked quinoa with cherry tomatoes and parsley for a quick prep.
- Lemon Wedges: A squeeze of lemon juice adds brightness and acidity without any extra work—just cut them up when serving!
- Avocado Slices: Creamy avocado complements the crispiness of the cakes; just slice them fresh right before serving to keep them vibrant.
These pairings will help you create a satisfying meal that feels well-rounded without being too heavy!
Salmon Cakes With Canned Salmon Variations
Here’s how to play with this recipe and make it your own!
- Herb Boost: Mix in 1 tablespoon of fresh dill or parsley with the other ingredients for a fresh twist.
- Spicy Kick: Add 1/2 teaspoon cayenne pepper when combining ingredients for a bit of heat.
- Cheesy Goodness: Stir in 1/4 cup shredded cheese (like cheddar) before forming patties for extra melty flavor.
- Veggie Addition: Toss in 1/4 cup finely diced bell peppers with the base mix for a colorful crunch.
- Next Level Upgrade: Replace half the bread crumbs with crushed crackers for an extra crispy texture when frying.
- Classic Swap: Use 1 tablespoon apple cider vinegar instead of lemon juice if you’re out of lemons.
- Smoky Flavor: Incorporate 1 teaspoon smoked paprika along with the garlic powder for a deeper, smoky base.
Make Ahead Options for Salmon Cakes With Canned Salmon
I love prepping the mixture for Salmon Cakes With Canned Salmon ahead of time. You can combine everything and form the patties a day in advance, then just cover them with plastic wrap and keep them in the fridge. When you’re ready to serve, all you need to do is heat up some olive oil and cook those babies for about 4-5 minutes on each side. Just a heads up: the cakes hold up well after cooking, but they don’t reheat as nicely if you make them too far in advance. So definitely cook them fresh! Use a glass container for storage. Trust me, it’s worth it!
Salmon Cakes With Canned Salmon Recipe FAQs
Can I make Salmon Cakes With Canned Salmon ahead of time?
Absolutely! You can prep the patties and refrigerate them for up to a day before cooking. Just make sure to cover them tightly with plastic wrap or place them in an airtight container. When you’re ready to cook, heat the oil until it shimmers (you’ll see tiny ripples) and then fry those babies up. Just keep in mind, they might take a minute longer to cook if they’re cold.
What can I substitute for green onions in this dish?
If you’re out of green onions, try using finely chopped chives or shallots instead. They’ll give you a similar mild onion flavor without overwhelming the cakes. Just make sure whatever you use is thinly sliced so it blends well into the mixture. (I know, I know — but hear me out: fresh herbs like dill could also work for a different vibe!)
Why did my Salmon Cakes With Canned Salmon turn out mushy?
Mushy cakes usually happen when there’s too much moisture or not enough binding agent. Make sure you’re draining that canned salmon well and don’t skip on the egg; it really helps hold everything together. Also, using panko bread crumbs instead of regular ones is key for that crisp-tender texture. If they’re mushy, pop ’em back in the fridge to firm up before frying.
How do I know when my salmon cakes are done cooking?
You’ll want them golden brown and crispy on both sides, which usually takes about 4-5 minutes per side over medium heat. Listen for that satisfying sizzle as they cook — it’s a good sign! If you’re unsure, cut one open; it should be firm and flaky inside with no gooey bits. And remember, letting them drain on paper towels afterward keeps them from getting soggy!
Final Thoughts on Salmon Cakes With Canned Salmon
These Salmon Cakes With Canned Salmon really shine in their simplicity and speed — you can whip them up in no time, even on a busy weeknight. The fresh flavors from the green onions and lemon juice bring everything together, making each bite satisfying without all the fuss. If you’ve been putting this off, tonight’s the night. Trust me, once you make these, they’ll become a go-to for those hectic evenings. Let me know how yours turned out in the comments!
Salmon Cakes With Canned Salmon
Ingredients
Method
- In a large mixing bowl, combine the drained canned salmon, bread crumbs, egg, green onions, lemon juice, Dijon mustard, garlic powder, salt, and black pepper.
- Mix until all ingredients are well combined and form a thick mixture.
- With your hands, form the mixture into patties, about 2-3 inches in diameter.
- Place the formed patties on a plate and refrigerate for about 10 minutes to firm up.
- Heat olive oil in a large skillet over medium heat.
- Once the oil is hot, add the salmon patties to the skillet, cooking in batches if necessary.
- Cook for about 4-5 minutes on each side or until golden brown and crispy.
- Remove the salmon cakes from the skillet and place them on a paper towel to drain excess oil.
- Serve hot with tartar sauce on the side, if desired.